
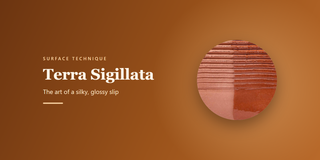
Terra sigillata is a very fine, silky slip that gives clay a smooth, glossy surface without any glaze. Potters have been using it for centuries, and it's still one of our favorite surface techniques.
A burnished terra sig surface catches the light like satin and feels as smooth as a river stone, and the clay color comes through with a depth that's hard to get from a commercial glaze. You don't need any special equipment to make it. All it takes is clay, water and some patience while the particles settle out.
What is terra sigillata?
Terra sigillata (Latin for "sealed earth") is an ultra-fine clay slip that takes on a polished, almost glossy finish when it's applied to greenware and burnished. Regular slip contains clay particles of every size. Terra sigillata is only the finest particles, the ones small enough to stay suspended in water while the heavier ones sink.
Why it shines
Clay is made up of particles of many sizes, from relatively large ones (still microscopic, but huge by comparison) down to the finest colloidal particles. Mix clay with water and let it sit, and gravity sorts those particles by weight:
- Coarse particles settle quickly to the bottom.
- Medium-sized particles form a middle layer.
- The ultra-fine particles stay suspended longest, at the top.
That top layer is terra sigillata. When you apply it and burnish it, the tiny particles line up flat against the surface, which gives you a smooth, reflective finish a lot like polished stone.
A little history
Terra sigillata goes back to ancient Roman pottery, and similar techniques showed up even earlier in Greek and Etruscan ceramics. The famous red-glossed Roman Samian ware was made with refined slips and burnishing, which is what we now call terra sigillata.
Those potters didn't know anything about particle physics. They just noticed that certain clay preparations, applied and polished, made beautiful surfaces. The technique was mostly forgotten for centuries, then picked up again by potters in the mid-20th century through archaeological research and experimentation.
Today it's a favorite with studio potters who want a subtle surface that shows off the clay instead of covering it with glaze.
How to make terra sigillata
Making terra sig is simple, but it takes time. You're not forcing anything. You're just letting the particles separate on their own.
Step 1: Choose your clay
Start with a smooth, refined clay body. The finer the clay you start with, the better your terra sig will be.
The clay also sets the color:
- Low-iron or white clay gives light cream to white surfaces. It's a good neutral base, and it works well with pastel colorants.
- Red or terracotta clay gives warm orange-red tones, like ancient Roman pottery.
- Buff or tan clay gives earthy, neutral tones.
A lot of potters make terra sig from the same clay body they throw with, so the two are guaranteed to fit. Others try different clays to get particular colors.
Step 2: Mix and slake
Start with 1 part dry clay to 3 to 4 parts water by weight. That makes a very thin slip.
- Add the dry clay to the water, not the other way around. It helps prevent lumps.
- Let it soak for several hours or overnight.
- Mix thoroughly with a drill mixer or by hand.
- Strain it through an 80-mesh screen to remove large particles and debris.
You're aiming for something like whole milk: thin enough to pour easily, but still obviously clay.
Step 3: Add a deflocculant (optional, but recommended)
A deflocculant keeps clay particles from clumping together. The fine particles stay suspended longer, and the finished terra sig is more fluid and easier to apply.
Common deflocculants:
- Sodium silicate (water glass), the most common and easiest to find
- Darvan 7 or 811, modern commercial deflocculants made for clay
- Calgon (sodium hexametaphosphate), a household water softener that also works as a deflocculant
Start with 1/4 teaspoon per quart of slip, and add it gradually while you mix, checking the consistency as you go. Too much makes the slip too thin. Too little and the particles clump.
Properly deflocculated slip feels slippery, almost slick, and pours smoothly.
Step 4: Let it settle
This is the part that takes patience. Pour the slip into a tall container. A clear one lets you watch the layers form, which is oddly satisfying.
Roughly what to expect:
- After 24 hours, the heaviest particles have settled to the bottom.
- After 48 to 72 hours, you'll see clear separation, with a dense bottom layer and a cloudy top layer.
- After 1 week, the separation is about as complete as it will get.
You'll end up with three layers:
- The bottom third to half is dense, thick clay. Throw it out or use it for something else.
- The middle is a transition zone of varying size. You can settle it again.
- The top third to half is your terra sigillata: smooth, fluid and made of the finest particles.
Step 5: Pour off the top layer
Carefully siphon or pour off the top layer without stirring up what's settled underneath. That's your finished terra sigillata.
Store it in sealed containers, and it will keep for months. Stir it gently before each use. Don't shake it hard, or you'll mix larger particles back in.
Finished terra sig should be a little thicker than skim milk but thinner than whole milk. If it's too thin, let it settle again and decant more carefully. If it's too thick, add a little water.
Applying terra sigillata
How you apply it makes a big difference. Terra sig doesn't handle like glaze.
When to apply
Terra sig works best on greenware, anywhere from leather hard to bone dry. Leather-hard clay absorbs some of it. Bone-dry clay gives the smoothest result, but you have to handle the piece carefully.
Most potters like firm leather hard. The piece is dry enough to handle with confidence and still soaks up the terra sig well.
Ways to apply it
Brushing. Use a soft brush, natural hair or soft synthetic. Put on thin, even coats, brushing in the same direction for each layer, and let each coat dry before the next. Three to seven coats is typical for good coverage.
Sponging. A natural sponge works best. Dab and smooth rather than wiping. It gives very even coverage and is especially good on textured surfaces.
Dipping. Quick and even, and good for small pieces or production work. You'll need enough terra sig to submerge the piece, and it may take 2 to 3 dips to get enough on.
Spraying. The most even application of all, but you need spray equipment. Lots of thin coats build up to the final finish.
Burnishing
Burnishing is what makes terra sig special. It lines up those fine particles and brings out the sheen.
Burnish when the terra sig is dry enough not to smear but not yet bone dry, usually 15 to 30 minutes after the last coat. The surface should feel cool to the touch (there's still moisture in it) but not wet.
Good burnishing tools include smooth stones like river rocks or polished agates, the back of a metal spoon, smooth plastic or metal ribs, and the burnishing tools sold by pottery suppliers.
- Use steady, firm pressure, but don't press hard enough to dent the piece.
- Make smooth, overlapping strokes.
- Work in sections, and finish each one before moving on.
- Keep going until you can see a sheen.
- If the sheen fades as the piece dries more, burnish again.
Properly burnished terra sig makes a slight squeak under the tool. That's the particles lining up.
Decorating with terra sig
There's a lot of room to experiment.
Masking. Apply terra sig only to some areas. Mask the rest with wax resist, latex or tape, and remove the masking after the terra sig dries to show the contrast.
Colors. Mix oxide colorants into separate batches of terra sig: iron oxide for reds, cobalt for blues, copper for greens. Apply them in layers or patterns.
Sgraffito. Brush on a few thin coats of terra sig, let them dry slightly, then carve through to the clay underneath. Burnish what's left, and you get matte carved lines against a glossy surface.
Burnished patterns. Burnish only parts of the coating. The burnished areas shine and the rest stays matte, for a subtle variation in the surface.
Over texture. Use it on carved, stamped or textured surfaces. It pools in the recesses, and the burnished high points catch the light.
With other techniques
Under clear glaze. A base layer of terra sig under a clear or translucent glaze adds depth. The burnished surface shows through the glaze.
With underglazes. Burnished terra sig makes a smooth, controlled surface for detailed underglaze work.
Smoke and pit firing. Terra sig takes smoke really well. Carbon leaves dramatic black markings on the burnished surface, while matte clay areas stay lighter.
Saggar firing. Inside a saggar, terra sig surfaces pick up rich, varied color from vapor and flame patterns.
Firing terra sigillata
Firing can preserve all that burnishing or wipe it out. Temperature and atmosphere both matter.
Temperature
Low fire (cone 06 to 04, 1828 to 1945°F). This is the best range for terra sig. It keeps the most sheen and the best surface. The particles sinter but don't over-mature, and the colors stay closest to the original.
Mid range (cone 5 to 6, 2167 to 2232°F). Terra sig survives, but it loses some of its sheen and starts to go matte. It still works, just with less shine. At this range it does better under a clear glaze.
High fire (cone 10+, 2345°F+). Generally not recommended for bare terra sig. The surface goes matte or disappears completely. Only use it at this temperature under a clear glaze.
Atmosphere
Oxidation (electric kiln). The standard choice. Colors come out accurate, results are reliable and predictable, and the surface is clean and bright.
Reduction (gas kiln). Can give interesting color variations, and iron-bearing clays turn richer red or black. It's less predictable and takes experience to control, but the results can be beautiful.
Smoke or pit firing. Burnished terra sig does wonderful things here. Carbon makes bold black patterns that contrast with the clean areas. You can't predict it, but it's often beautiful.
Troubleshooting
| Problem | Likely cause | What to try |
|---|---|---|
| Terra sig flaking off | Applied too thick, clay not compatible, or not burnished at the right dryness | Thinner coats, a compatible clay, and burnishing at the right moisture level |
| Uneven sheen | Uneven burnishing pressure or timing | More even pressure, and burnish the whole surface at the same dryness |
| Dull, matte surface after firing | Fired too hot, over-burnished, or terra sig too thick | Fire lower, burnish more lightly, apply thinner |
| Cracking or crazing | Terra sig shrinks differently from the clay body | Make the terra sig from the same clay as the piece, or add a little of the piece's clay to it |
| Color not what you expected | Kiln atmosphere, firing temperature, or impurities in the clay | Test fire samples, adjust the temperature, use a purer clay |
Why potters use it
Terra sig shows off the clay instead of hiding it under an opaque glaze. The surfaces are quiet and subtle, and a burnished piece feels silky, almost soft, even though it's fired ceramic. People can't help touching it.
It works on just about anything: hand-built and wheel-thrown pots, sculpture, tiles and architectural pieces, functional ware and pure art objects. You can use it as the only surface treatment, under glaze, with resist decoration, over carving and texture, or in alternative firings.
There are practical upsides too:
- No glaze needed. For low-fire decorative work, you skip the cost and hassle of glazing.
- Very little equipment. Glazing can mean kiln furniture, ventilation for some glazes and lots of testing. Terra sig only needs clay, water and patience.
- Easy to experiment with. It's mostly refined clay, so you don't need glaze chemistry to get started. Treat it like any clay material, though: keep the dust down (dry clay dust contains silica), and wear gloves and a mask when you add colorants like cobalt, copper or manganese.
- Low waste. It uses very little material and can be made from scrap clay and water.
Getting started
If you've never tried terra sig, keep the first project simple: small burnished bowls or cups, decorative tiles, simple hand-built vessels, or test tiles to try out colors and techniques.
What you'll need:
- Clay (start with a clay body you already know)
- Water
- Deflocculant (optional, but it helps)
- A tall container for settling
- Soft brushes or sponges
- Burnishing tools (smooth stones or spoons)
How long it takes:
- Making terra sig: about 15 minutes of actual work, then 3 to 7 days of settling
- Applying: 30 minutes to several hours, depending on the size of the piece
- Burnishing: 15 minutes to 2 hours per piece
Your first pieces probably won't have a mirror finish, and that's fine. Even an imperfect terra sig surface looks good, and every piece teaches you something about timing and pressure.
Terra sig is about as basic as pottery gets: clay and water, refined slowly, with no complicated chemistry or expensive materials. Beginners can pick it up quickly, and experienced potters keep finding ways to push it further.
We carry the clays, deflocculants and tools you need to get started. Give it a try on a few test tiles and see what your clay does.